Help
Overview
Getting Started
Using Easy-Commission Application
Rep
Master Data
Calculation Rules
Transactions
Calculation Process
Dashboard
Commission Statements
Period Close
Year End
Configuring Easy-Commission Application
User Setup
Appendix
Help
Overview
Getting Started
Using Easy-Commission Application
Rep
Master Data
Calculation Rules
Transactions
Calculation Process
Dashboard
Commission Statements
Period Close
Year End
Configuring Easy-Commission Application
User Setup
Appendix
Groups are a way to classify transactions for reporting or calculations. These can be any user-defined group. An example of a group is a sales team based on special characteristics or external parties like vendors, channel partners, etc, or set of new customers or set of old customers. You need not use groups, if your commission plan does not use groups to determine who made the sale or if payouts do not depend upon the group data.
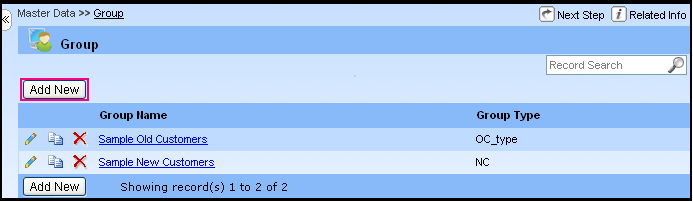
The Group page contains information about the group details. After entering the Group's master details, you can set group based commission plan and enter the transaction details. The Group menu lets you quickly create, and view the Groups information. You can sort and filter Groups information using standard and custom list views provided below the Title in a page. In addition, this page lets you copy, and delete, edit the Groups information. In the Next Step section of the Group page, you can add group based commission plan or transaction. This page also lets you to go to the previous page and Home page. In the Related Information section, you can view the information related to the Group page.
You can click Master Data ? Group menu item to display the "Group" page. This page will list all the Group ID, Group Name, Links to Edit, Copy, Delete option.
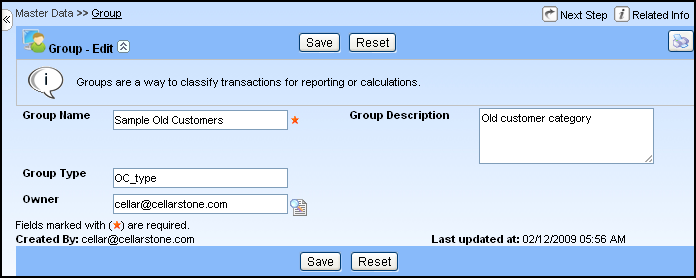
Here is a description of the Group standard fields. Some of these fields may not be editable depending on your page layout.
| Field | Description |
| Group ID | Identifying code for the Group. Up to 255 characters are allowed in this field. |
| Group Name | Name of the Group. Up to 255 characters are allowed in this field. |
| Group Description | Short description of the Group. Up to 255 characters are allowed in this field. |
| Group Type | Type of the Group i.e., Family Name to which the group belongs. Up to 255 characters are allowed in this field. |
The user can create new group details such as Group ID, Group Name, Group Description, and Group type. For example, to add new group "Repair and Maintenance" details, follow the steps given below:
Note:
